Quick answer: To update a Linsn LED receiving card in LEDStudio, open Option > Software Setup, enter linsn, then enter 168. Open the Receiver 1 tab, enter cfxoki, load the update file supplied for your exact receiving card, and select Programming. Wait for the process to finish, exit the window, and power-cycle the system once. A Linsn sending card and a stable power and data connection are required throughout the update.
This guide covers the maintenance workflow used by older versions of Linsn LEDStudio. Menu names can differ between software versions. Receiving-card update data changes the card’s hardware program; it is not the same as routinely loading an LED module configuration or RCG file. Continue only when you have an update file confirmed for the exact card model and hardware revision.
What You Need Before Updating
- A Windows PC with the correct version of Linsn LEDStudio installed
- A working Linsn sending card connected to the receiving-card chain
- The receiving card powered on, online, and reporting a normal status LED
- The update data file supplied for the exact receiving-card model and revision
- Stable power and an uninterrupted data connection
- A backup of the current working configuration, when available
Important: Do not use an update file because its filename looks similar. A file for a different card or hardware revision can cause abnormal output or leave the card unable to start.
Linsn Receiving Card Update: Quick Reference
| Stage | Action | What to Enter or Select |
|---|---|---|
| 1 | Open software settings | Option > Software Setup |
| 2 | Open the maintenance prompt | linsn |
| 3 | Open Hardware Parameters Setup | 168 |
| 4 | Open the receiving-card update window | Receiver 1, then cfxoki |
| 5 | Select the approved update file | Load |
| 6 | Write the hardware program | Programming |
| 7 | Complete the update | Exit, power-cycle once, and verify |
How to Load Update Data to a Linsn LED Receiving Card
1. Check the Hardware and Signal Chain
Connect the control PC, Linsn sending card, receiving card, and LED display as they are used in normal operation. Confirm that the receiving card is powered and that its status indicator is behaving normally. If the card is offline or the status LED is abnormal, fix the power or data-link problem before attempting an update.
2. Open Software Setup in LEDStudio
Start LEDStudio. From the main menu, choose Option > Software Setup. Keep the sender and receiving card connected while you work.
3. Open Hardware Parameters Setup
In the Software Setup window, enter linsn. When the next prompt appears, enter 168. This opens the Hardware Parameters Setup area in the LEDStudio versions that use this maintenance workflow.
If the expected prompt does not appear, stop and check your LEDStudio version or ask your Linsn equipment supplier for the correct procedure. Do not keep trying unrelated passwords or menus.
4. Open the Receiving-Card Update Window
Select the Receiver 1 tab, then enter cfxoki. LEDStudio should open an Updating Program window. Confirm that you are working with the intended receiver before continuing.
5. Load the Correct Update File
Select Load and choose the update data file stored on the PC. Before programming, compare the card model and hardware revision with the information provided by the file supplier. If either item is uncertain, cancel the operation and verify the file first.
6. Start Programming and Do Not Interrupt It
Select Programming. Leave the PC, sending card, Ethernet cable, receiving card, and LED screen power connected until LEDStudio reports that programming has finished. Do not close LEDStudio, restart the computer, disconnect a cable, or switch off the display during this stage.
7. Exit, Power-Cycle, and Verify
After programming finishes, select Exit. Switch the system power off once, wait for the equipment to shut down fully, and then power it on again. Verify the receiving-card status, the image output, and the panel behavior before returning the screen to service.
Critical Safety Rules
- Use a sending card: this update workflow depends on a working Linsn sender in the data chain.
- Keep power stable: an interrupted write can leave the receiving card without a usable hardware program.
- Keep the data link stable: do not move or disconnect network, USB, or video cables during programming.
- Use the exact file: receiving cards that look similar may use different hardware programs.
- Test one receiver first: verify a single card before updating additional cards, unless the supplier gives a different documented procedure.
How to Verify a Successful Update
After the controlled reboot, check all of the following:
- The receiving card starts and its status indicator returns to normal.
- LEDStudio can detect the receiving card.
- The LED cabinet displays an image without missing rows, incorrect colors, flicker, or repeated sections.
- Brightness, scan behavior, and cabinet mapping remain correct.
- The display stays stable for several minutes without link errors or unexpected restarts.
If the card starts but the panel image is incorrect, the hardware update may have completed while the module configuration still needs to be restored. Load only the known-good configuration for that exact LED module and cabinet.
Troubleshooting Common Problems
| Problem | Likely Cause | Recommended Action |
|---|---|---|
| The Updating Program window does not open | Different LEDStudio version, wrong active window, or unsupported workflow | Confirm the software version and obtain the matching instructions from the supplier. |
| The receiving card is not detected | Power, sender, Ethernet, or communication problem | Restore normal communication before programming. Do not update an offline card. |
| Programming does not start | Wrong file, inaccessible file, or unstable connection | Cancel, confirm the file and card revision, then check the entire signal chain. |
| The update was interrupted | Power loss, cable disconnection, or software shutdown | Do not load random files or repeatedly power-cycle the card. Restore a stable connection and request the correct recovery package from the supplier. |
| The card starts but the image is wrong | Incorrect hardware program or missing module configuration | Verify the update-file match, then restore the known-good configuration for the display module. |
Frequently Asked Questions
Do I need a Linsn sending card to update a receiving card?
Yes. The workflow described here sends the update data through a working Linsn sending card to the receiving card. Do not begin if the sender or data connection is not operating normally.
Why are the codes linsn, 168, and cfxoki used?
In older LEDStudio versions, these entries open maintenance and hardware-programming areas that are not shown in the standard interface. They are version-specific access steps, not update files or receiving-card settings.
Is receiving-card update data the same as an RCG or display configuration file?
No. Update data programs the receiving card’s hardware or firmware-level behavior. A display configuration or RCG file defines module and cabinet parameters such as scan behavior, mapping, and output. Some suppliers use different terminology, so confirm the file type before loading it.
Can I update all receiving cards at the same time?
Test the approved file on one receiving card first. Update multiple cards only when the supplier confirms the correct scope and procedure for your system.
What should I do if the receiving-card status LED is not normal?
Do not start programming. Check the receiving-card power, sending card, Ethernet link, and software communication. The card should be online and stable before update data is written.
Need Help Matching the File to Your Card?
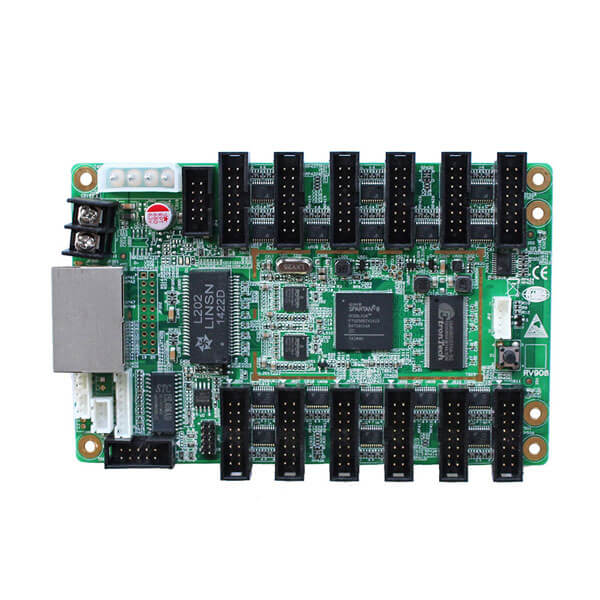
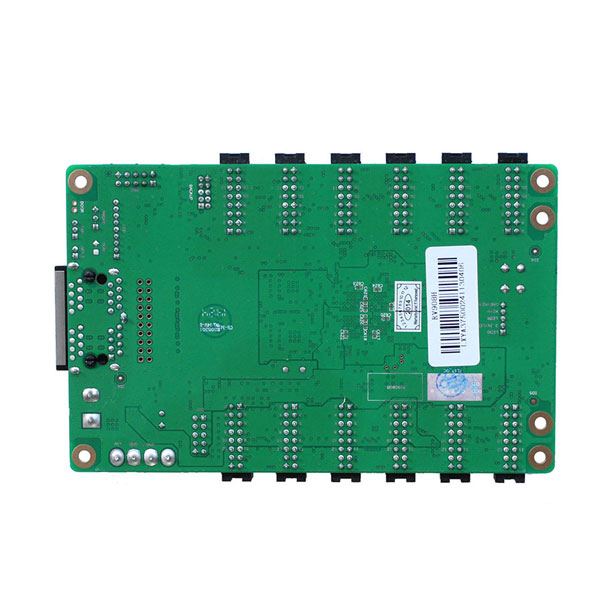
Record the receiving-card model, hardware revision, LEDStudio version, and a clear photo of both sides of the card before contacting support. You can also browse our LED receiving cards or contact EagerLED for compatibility help.