Quick answer: To judge LED transparent screen quality, test seven areas under the conditions in which the display will actually operate: brightness and contrast, color uniformity, grayscale and refresh performance, transparency and viewing angle, LED package consistency, thermal stability, and mechanical/electrical workmanship. A good screen should remain uniform, readable, cool enough for stable operation, structurally precise, and easy to service after an extended test.
Do not approve a transparent LED display from a showroom video or maximum-brightness claim alone. Ask for a working sample, play controlled test patterns, inspect the screen from the front and rear, and compare the results with the supplier’s written specifications.
What Defines a High-Quality LED Transparent Screen?
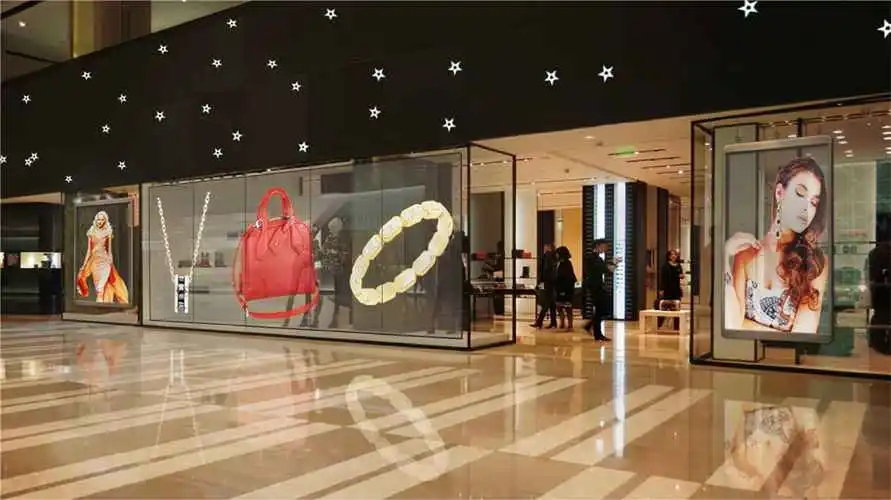
A high-quality transparent LED screen balances image performance, optical transparency, reliability, and serviceability. These factors interact. A narrower pixel pitch can improve image detail, for example, but may reduce transparency because more LEDs and circuit material cover the glass.
| Quality factor | How to test it | Good signs | Warning signs |
|---|---|---|---|
| Brightness and contrast | Test in the real ambient light and view from the intended distance | Content stays clear without excessive glare | Washed-out images, crushed dark areas, or brightness that changes by module |
| Color uniformity | Show full-screen white, red, green, blue, and gray patterns | Even color and luminance across the entire screen | Color patches, bright lines, dark strips, or visible cabinet boundaries |
| Motion and grayscale | Play gradients, low-gray images, and fast-moving video | Smooth gradients and stable motion | Banding, flicker, scan lines, ghosting, or lost shadow detail |
| Transparency and viewing angle | Inspect from the main viewing positions with the screen on and off | Useful visibility through the glass and a consistent image off-axis | Unexpected obstruction, color shift, or rapid brightness loss |
| Thermal behavior | Run demanding content for at least 30 to 60 minutes and measure temperatures | Temperatures stabilize without hot spots or protection events | Local overheating, odor, shutdowns, or repeated brightness reduction |
| Workmanship | Inspect cabinets, solder joints, cables, connectors, and module alignment | Clean assembly, secure connections, and precise seams | Loose parts, residue, bent strips, poor joints, or difficult access |
7 Practical Checks for LED Transparent Screen Quality
1. Match Brightness to the Installation Environment
More brightness is not automatically better. The right level depends on ambient light, glass reflectivity, content, viewing distance, and whether direct sunlight reaches the display. A screen facing a bright shop window needs more output than one inside a controlled indoor space.
Test the sample at the expected operating brightness, not only at 100%. If possible, use a calibrated luminance meter and record the result. Check that the display remains readable during the brightest part of the day without becoming uncomfortable at night. Also confirm that brightness can be scheduled or adjusted automatically.
2. Check Color and Luminance Uniformity
Uniformity is one of the clearest differences between a well-matched display and a low-cost assembly. Show full-screen white, red, green, and blue images. Then inspect mid-gray and low-gray patterns. View the screen from the normal audience position and from closer range.
Look for color tint, dark bands, bright strips, inconsistent LED rows, and visible cabinet boundaries. The same batch of LED packages and proper factory calibration generally produce a more consistent result. Ask whether replacement modules can be recalibrated to match the original screen.
3. Test Grayscale, Refresh Rate, and Camera Performance
A static bright image can hide processing problems. Play dark footage, smooth gradients, fine text, and fast motion. Good grayscale performance should retain detail in shadows without obvious steps or color noise. Motion should remain clean, with no persistent ghosting.
If the display will appear in photos, livestreams, or broadcast video, test it with the actual camera and shutter settings. Scan lines or rolling bands on camera can indicate that the refresh rate, scan configuration, or controller settings are unsuitable for the project. Request the tested refresh-rate and grayscale specifications in writing.
4. Balance Transparency, Pixel Pitch, and Viewing Angle
Transparency claims should be evaluated from the audience’s real line of sight. Cabinet frame width, LED strip width, pixel pitch, power boxes, cable routing, and the mounting structure all affect the final result. A percentage on a data sheet may not represent the complete installed system.
Inspect the screen when it is powered off and when it is showing bright content. Walk across the intended viewing area. Check for rapid brightness loss, color shift, moire patterns, and obstructions caused by frames or cables. Choose the balance that fits the project instead of selecting the highest transparency figure in isolation.
5. Inspect LED Packages, Dead Pixels, and Emission Design
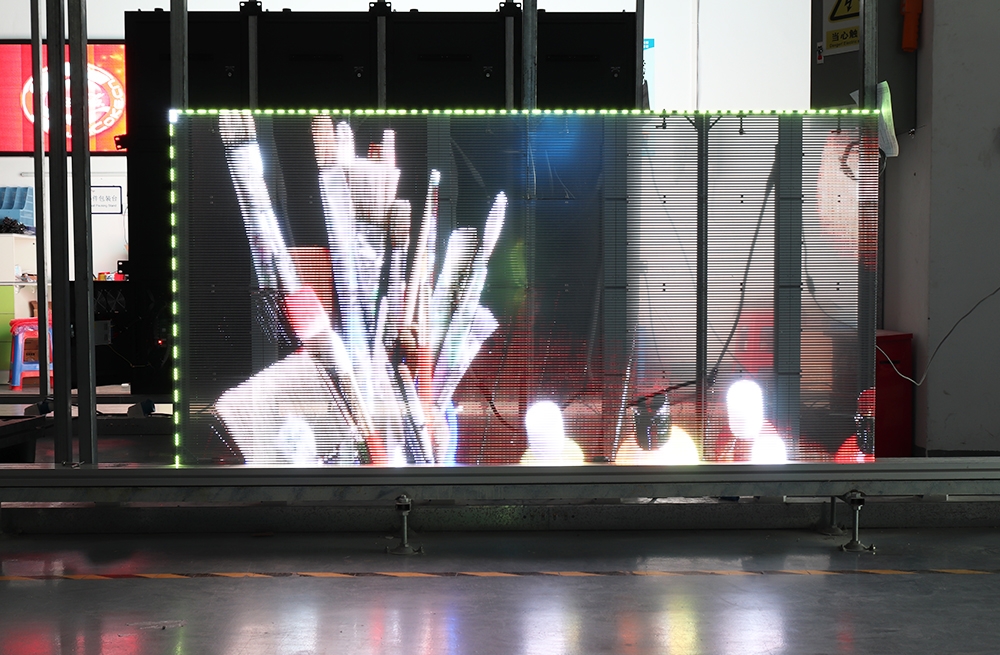
Run single-color and white test patterns to reveal dead, stuck, dim, or mismatched pixels. Examine several cabinets, not just one selected sample. Ask for the accepted pixel-defect policy at delivery and the process for replacing failed strips or modules.
Transparent displays may use front-emitting or side-emitting LED packages. Side-emitting designs can support a slim optical profile, while front-emitting designs use a widely adopted package orientation. Neither design is inherently superior in every application. Compare measured brightness, viewing angle, reliability, service access, and image quality for the exact model being offered.
6. Measure Temperature and Long-Run Stability
Heat affects LED output, color consistency, power supplies, and component life. Run high-brightness white content and typical video for at least 30 to 60 minutes. Use an infrared thermometer or thermal camera to compare LED strips, power units, connectors, and neighboring cabinets. Do not touch energized components.
Temperatures should rise gradually and then stabilize. Investigate isolated hot spots, repeated restarts, protective dimming, unusual odor, noisy power supplies, or a widening color difference as the display warms. For a large order, request the supplier’s aging-test procedure and quality-control records.
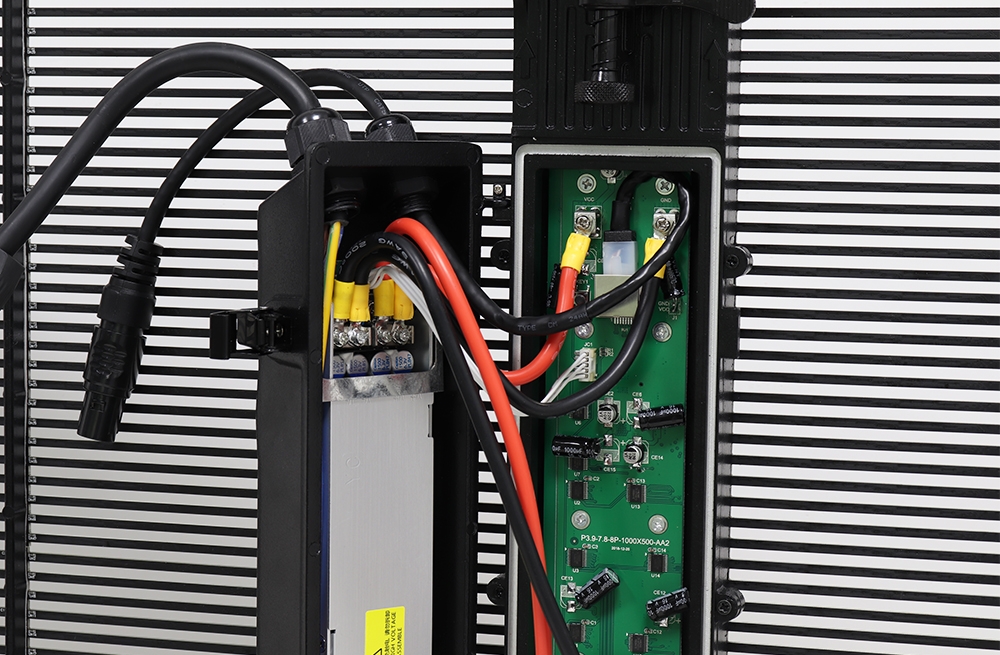
7. Examine Wiring, Soldering, Structure, and Service Access
Turn off and isolate power before inspecting the rear of the screen. Cables should be correctly sized for the documented load, neatly routed, strain-relieved, and secured with reliable connectors. Safety marks should be traceable to the relevant component and certification record; a printed logo alone is not proof.
Inspect solder joints for consistent wetting and full contact. Look for cracks, bridges, excess residue, exposed conductors, bent LED strips, loose fasteners, and uneven protective coating. Cabinet edges should align without forcing. Modules, receiving cards, power supplies, and cables should be accessible within the planned maintenance space.
On-Site LED Transparent Screen Acceptance Test
- Confirm the sample: Verify model, pixel pitch, cabinet size, LED package, controller, receiving card, power supply, and firmware against the order.
- Inspect power-off quality: Check frame alignment, strip spacing, connectors, cables, mounting points, and access for maintenance.
- Run test patterns: Display black, white, red, green, blue, gray ramps, fine text, and a pixel-check pattern.
- Test real content: Use the project’s videos and viewing distances under day and night lighting conditions.
- Complete a thermal run: Operate the screen for at least 30 to 60 minutes, record temperatures, and watch for instability.
- Document the result: Photograph defects, record cabinet serial numbers and settings, and have both parties sign the acceptance criteria.
Questions to Ask an LED Transparent Screen Supplier
- What are the measured brightness, color temperature, refresh rate, grayscale, viewing angle, and transparency for this exact model?
- Which LED package, driver IC, receiving card, and power supply are used, and can component substitutions occur?
- What are the typical and maximum power consumption figures for the complete installed screen?
- What pixel-defect limit applies at delivery, and how are later failures handled?
- Can replacement modules be calibrated to match the original production batch?
- What environmental rating, operating-temperature range, and maintenance clearance does the installation require?
- What aging test, factory inspection, warranty, spare-parts package, and remote support are included?
Verify any claimed safety certification through the issuing organization’s official database. For example, UL explains how to find certification records through UL Product iQ.
Frequently Asked Questions
Can you judge a transparent LED screen by appearance alone?
No. Appearance can reveal cabinet alignment, damaged strips, poor connectors, and untidy wiring, but it cannot confirm grayscale, refresh performance, thermal stability, calibration, or long-term reliability. A powered test and a written specification are essential.
How bright should a transparent LED screen be?
The correct brightness is the level that keeps content readable in the brightest expected ambient light while remaining comfortable at lower light levels. Test the actual glass, viewing distance, and content. Do not choose a screen from a maximum-brightness number alone.
Is higher transparency always better?
No. Higher transparency may require wider pixel spacing or narrower LED strips, which can affect resolution, brightness, viewing angle, or structural design. Select the best balance for the audience distance and visual goal.
Is side-emitting or front-emitting LED technology better?
Neither is universally better. Side-emitting and front-emitting packages create different optical and mechanical trade-offs. Compare the exact product’s measured performance, component quality, service access, and reliability data.
How long should a sample be tested?
A 30-to-60-minute run can reveal immediate hot spots and operating instability during acceptance. It does not replace factory aging or longer reliability testing. Ask the supplier to document its production aging process and defect criteria.
Final Recommendation
The best LED transparent screen is not simply the brightest or most transparent model. It is the display that meets the project’s viewing conditions, stays uniform through low-gray and motion tests, operates without abnormal heat, uses consistent components, and can be maintained safely.
Compare suitable LED display screen options, then contact our LED display team with the glass dimensions, viewing distance, ambient-light conditions, content type, and installation photos. Those details make it possible to recommend and test the right configuration.